Has the installation of patches through Cloud Foundation always been straightforward for you? …. Well, that’s not always the case.
This post guides you through the process of downloading these (vCenter patch) bundles through Cloud Foundation using the Async Patch Tool. You can also apply this to NSX-T or ESXi host patches. The Async Patch Tool is a utility that allows you to apply critical patches outside of the normal VMware Cloud Foundation lifecycle management process.
Within VMware Cloud Foundation 4.x or higher you can have VCF download patches for you. However, there are cases you have to manually add the bundles to the repository outside of the normal VCF Lifecycle process. This can be accomplished using the AsyncPatch Tool (AP Tool). VMware created a documentation page and a PDF document for this. From here you can also download the most recent version.
This post guides you through the process of downloading a new patch. This guide refers to patches mentioned in VMSA-2023-0014, for which vCenter patches 7.0U3m is downloaded as a Repository Bundle. From this link you can find some more info, and moreover, the current list of software versions and respective bundle-id’s. These include patches for NSX-T, ESXi, vCenter as well as VxRail.
The steps required for this are described in more detail below:
- Open an SSH session to your SDDC Manager and login as user vcf (with credentials)
- Please make sure to keep the SSH session open with the Putty option Enable TCP keepalives (SO_KEEPALIVE option)
- Open the PuTTY general configuration.
- In the left Category list section, select Connection.
- In the field ‘Seconds between keepalives (0 to turn off)’, enter 15.
- Check the box for ‘Enable TCP keepalives (SO_KEEPALIVE option)’.
- Check whether or not the vcf and/or root password is expired: chage -l vcf ; chage -M 9999 vcf
- Please make sure to keep the SSH session open with the Putty option Enable TCP keepalives (SO_KEEPALIVE option)
-
Download and extract the latest asyncPatchTool (Latest version can be found on my.vmware.com, or release notes).
a. Check if there is a newer version available of the async patch tool. If it is true, delete the old version (step a) and recreate the folders (step b)rm-r/home/vcf/asyncPatchTool -f
rm-r/home/vcf/apToolBundles -fb. Create the temp directory for the async patches
mkdir/home/vcf/asyncPatchTool -
Run the following, as user vcf
cdasyncPatchTool
wget https://download3.vmware.com/software/VCF4xAP_TOOLS/vcf-async-patch-tool-1.1.0.1.tar.gz
tarxvzf vcf-async-patch-tool-1.1.0.1.tar.gz
cd/home/vcf
chmod-R 755 asyncPatchTool
chown-R vcf:vcf asyncPatchToolContinue as user vcf
-
List the available patches (replace email address with your own vmware user account.) (Code below is only for reference)
cd/home/vcf/asyncPatchTool/bin./vcf-async-patch-tool--listAsyncPatch --du"CustomerConnectAccount@tld.com"-----------------------------------------------------------------------------Product Type Version Sku Bundle Name-----------------------------------------------------------------------------ESX_HOST 7.0.2-19290878 [VCF] bundle-56553ESX_HOST 7.0.1-19324898 [VCF] bundle-55488ESX_HOST 7.0.3-20036589 [VCF] bundle-58889ESX_HOST 7.0.3-20328353 [VCF] bundle-60929ESX_HOST 7.0.3-20842708 [VCF] bundle-66405ESX_HOST 7.0.3-21053776 [VCF] bundle-69531ESX_HOST 7.0.3-21313628 [VCF] bundle-70817ESX_HOST 7.0.3-21424296 [VCF] bundle-72874ESX_HOST 7.0.3-21686933 [VCF] bundle-78085VCENTER 7.0.3.00500-19480866[VCF, VCF_ON_VXRAIL] bundle-55743VCENTER 7.0.3.00700-20051473[VCF, VCF_ON_VXRAIL] bundle-58885VCENTER 7.0.3.00800-20150588[VCF, VCF_ON_VXRAIL] bundle-59284VCENTER 7.0.3.01000-20395099[VCF, VCF_ON_VXRAIL] bundle-61453VCENTER 7.0.3.01100-20845200[VCF, VCF_ON_VXRAIL] bundle-66401VCENTER 7.0.3.01200-20990077[VCF, VCF_ON_VXRAIL] bundle-67932VCENTER 7.0.3.01400-21477706[VCF, VCF_ON_VXRAIL] bundle-73797VCENTER 7.0.3.01500-21784236[VCF, VCF_ON_VXRAIL] bundle-81248VCENTER 8.0.1.00200-21860503[VCF, VCF_ON_VXRAIL] bundle-81347NSX 3.1.3.7.4-19762317 [VCF, VCF_ON_VXRAIL] bundle-57417NSX 3.1.3.8.0-20532384 [VCF, VCF_ON_VXRAIL] bundle-63129NSX 3.2.2.0.0-20737185 [VCF, VCF_ON_VXRAIL] bundle-64956NSX 3.2.2.0.1-20959512 [VCF, VCF_ON_VXRAIL] bundle-68961NSX 3.2.2.1.0-21487560 [VCF, VCF_ON_VXRAIL] bundle-74617NSX 3.2.3.0.0-21703624 [VCF, VCF_ON_VXRAIL] bundle-79596 -
Download the required async patch
cd/home/vcf/asyncPatchTool/bin./vcf-async-patch-tool-e --patch VCENTER:7.0.3.01000-20395099 --du"CustomerConnectAccount@tld.com"--sddcSSOUser"[sddcSSOUser]"--sddcSSHUser vcf --it ONLINEScreenshot of the the command:
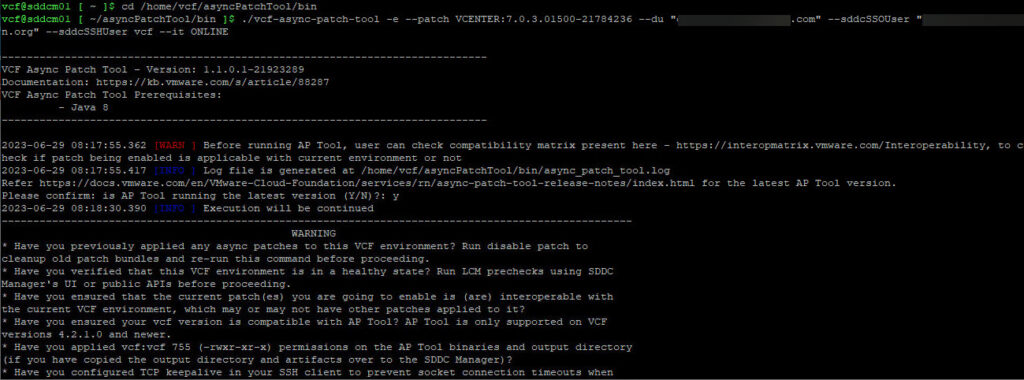
You can find the complete output here as a text file: AsyncPatchToolCLI
-
Please note: if you need to use certain account names
- SDDC SSO User : the user account you usually use with your SSO domain for this SDDC Manager
- SDDC Manager Super User’s (vcf) Password: the password that comes with user vcf
- SDDC Manager Root User (vcf) Password: the password that comes with user root
- SDDC Manager SSO Password: the user password that comes with your SSO domain for this SDDC Manager
- Enter Depot User Password: the password that comes with the VMware Customer Connect password
If the precheck fails resolve the errors first. Else go further with Part 2.
For ” UNUSED_PRE_UPLOADED_AP_TOOL_BUNDLES” perform the activities in step 10.su
python/opt/vmware/vcf/lcm/lcm-app/bin/bundle_cleanup.py 0bc81892-da52-4eb8-9b64-c65212b1ef5d-apTool
exitor use the
-disableAllPatchesparameter as described in step 10 first.Then run previous step 6 “Download the required async patch” again.
- After waiting for the download, you will find the patch from
- Apply the patch
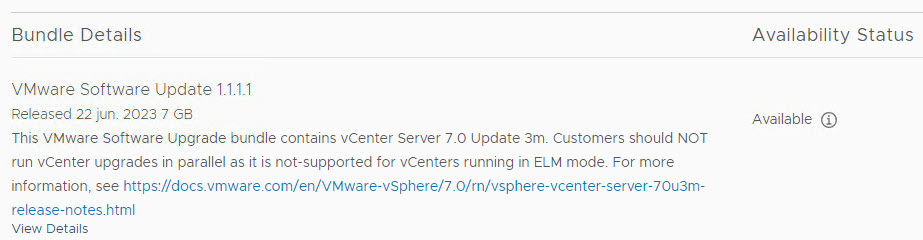
- Go to SDDC Manager > Inventory > Workload Domains > Select the workload domain (e.g. Management) > Select the Domain > Select the tab Update / Patches
- You will find an additional patch available, in our case
- If the precheck was successful, install the update.
- Note that during the update to vCenter 7.0 U3x, the LookUp Service could not start successfully. You can confirm this through the vCenter VAMI >Services
- The first workaround (SSH > stop and start vCenter Services : service-control –stop –all && service-control –start –all) in KB89163 can be applied easily; SDDC Manager was able to resume the vCenter Update Post install steps.
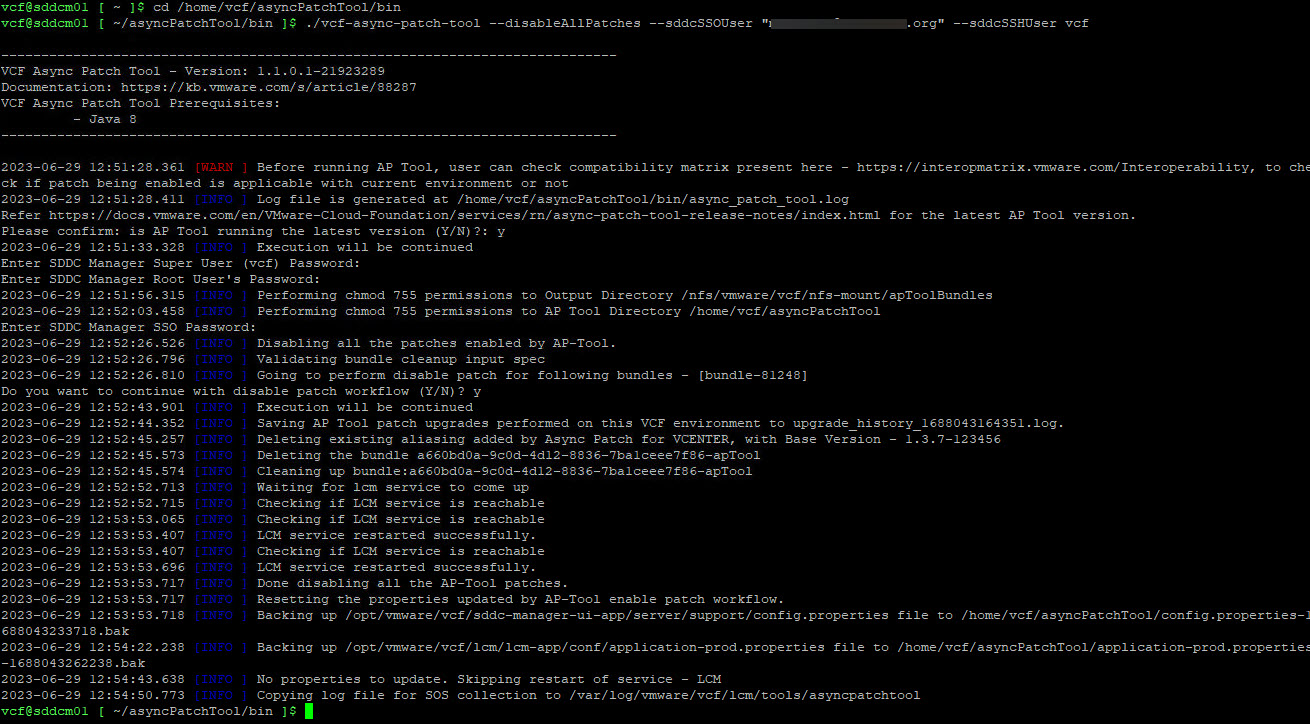
- When the update has finished for all workload domains, please make sure to remove the staged/downloaded bundle from SDDC Manager
./vcf-async-patch-tool -disableAllPatches --sddcSSOUser administrator@vsphere.local --sddcSSHUser vcf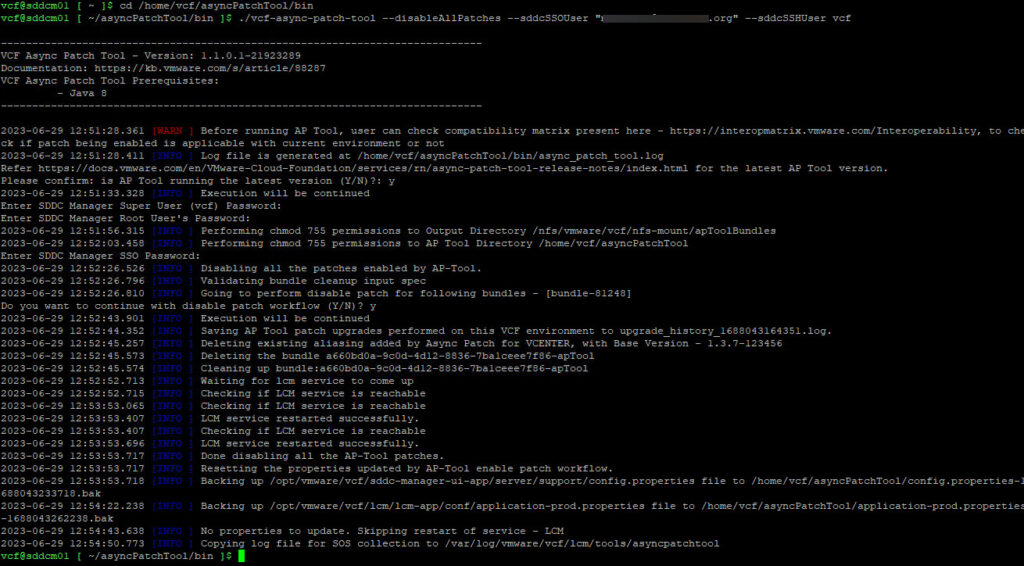
11. When you log back into SDDC Manager, you will find your downloaded patch under Lifecycle Management >> Bundle Management
Job well done!