In this second blog post – out of three steps – we will guide you through the required update steps to update vCenter Server 8.0 U2 to 8.0 U3d, as part of the VCF 5.1.1 through SDDC Manager. The keen-eyed reader might know that the vCenter Server 8.0 U3d release is not part of the SDDC Manager 5.2.1 – Bill-of-Materials. Therefore, we will intregate the newly introduced VCF feature for the async patch.
Phases involved during a VCF Upgrade
For each of these phases, you will find a separate blog post.
You will find many pictures and references to documentation, such as:
- Release Notes for Cloud Foundation 5.2.1, including Bill-of-Materials
- ESXi 8.0 Update 3b, part of the 5.1.1 Bill-of-Materials
- Updating to Cloud Foundation 5.2.x
The steps involve
- Make sure you always make appropriate snapshots and backups before you start.
- Login to SDDC Manager using your credentials
- Download the SDDC Manager bundle through SDDC Manager itself
- Navigate to Inventory > Workload Domains > Management Domain > Select Updates and open Available Updates > Cloud Foundation 5.2.1.0
- Confirm that with Plan Upgrade the Target Version (5.2.1.0) is selected.
- Next bundle to download is the 18GiB (!) sized vCenter Update 8.0 U3b OR the async patch for vCenter Update 8.0 U3d (resolves vulnerability VMSA-2024-0019.2)
- For vCenter Update 8.0 U3d, navigate to Lifecycle Management > Bundle Management > find the patch (version 1.1.1.1) and Click Download Now
- After the download you can customize the upgrade to include the async patch
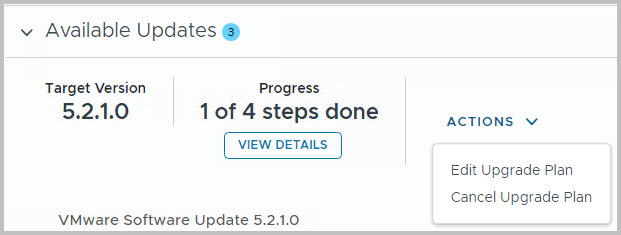
- Navigate to Inventory > Workload Domains > Management Domain > Select Updates and open Available Updates > Select Cloud Foundation 5.2.1.0
- Click Actions > Edit Upgrade Plan
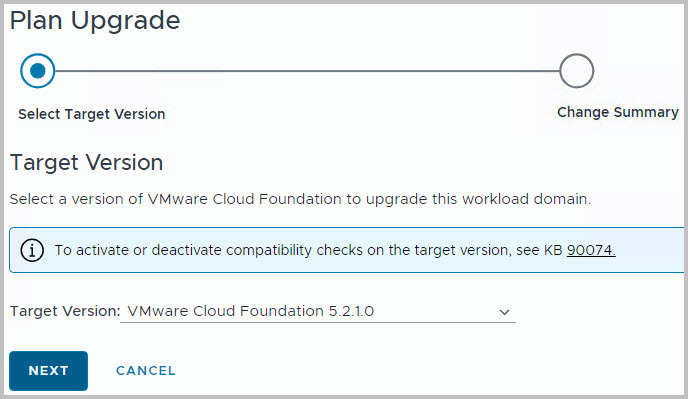
- Confirm the target version
- Wait a little while; the change summary will be repopulated with the component versions
- If nothing pops up eventually, you might need to resolve this first through this blog post or Knowledge Base article KB380402.
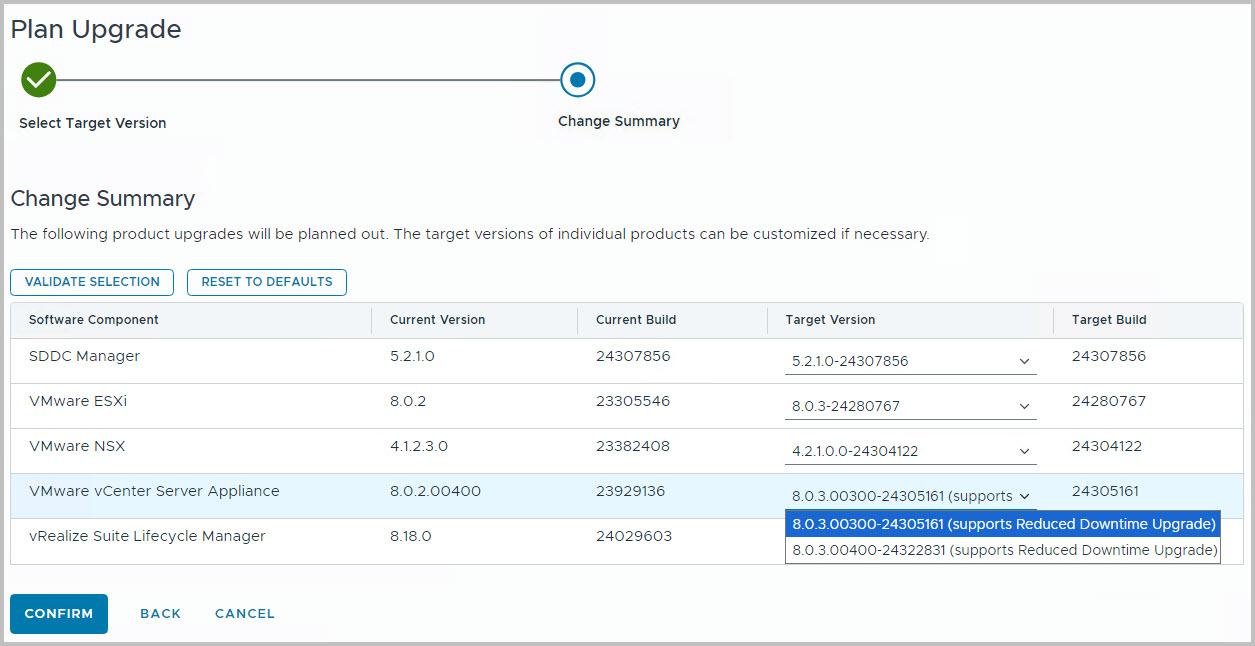
- Click Customize Upgrade
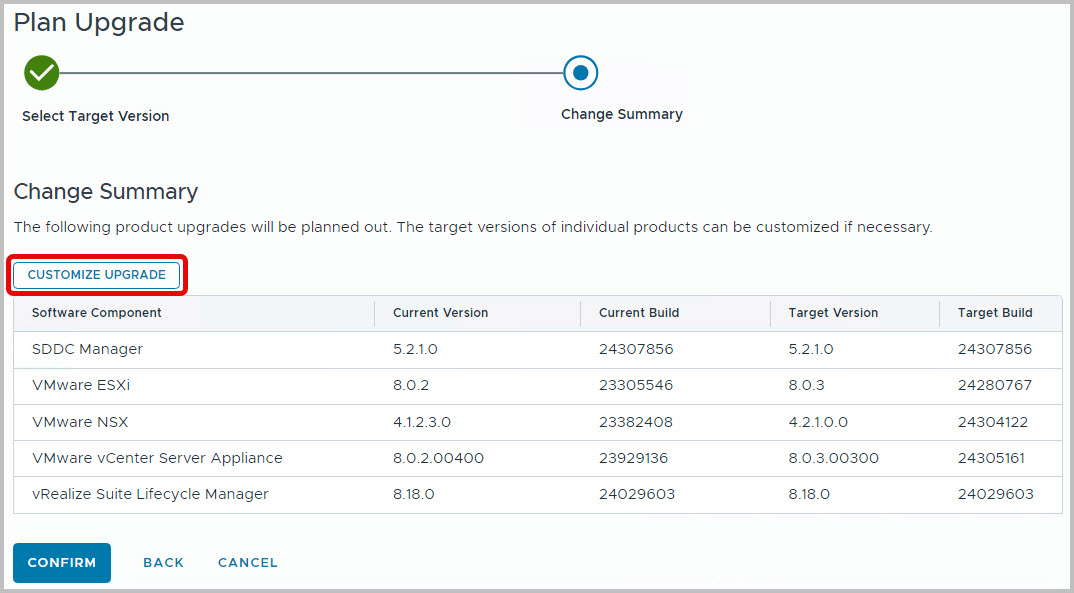
- Find the downloaded async patch (version 1.1.1.1) from the dropdown box with the vCenter Server Appliance; select it and click Confirm
- The updated Update Sequence preview is shown. You will see that the Async Patch is integrated in the worklflow, great!
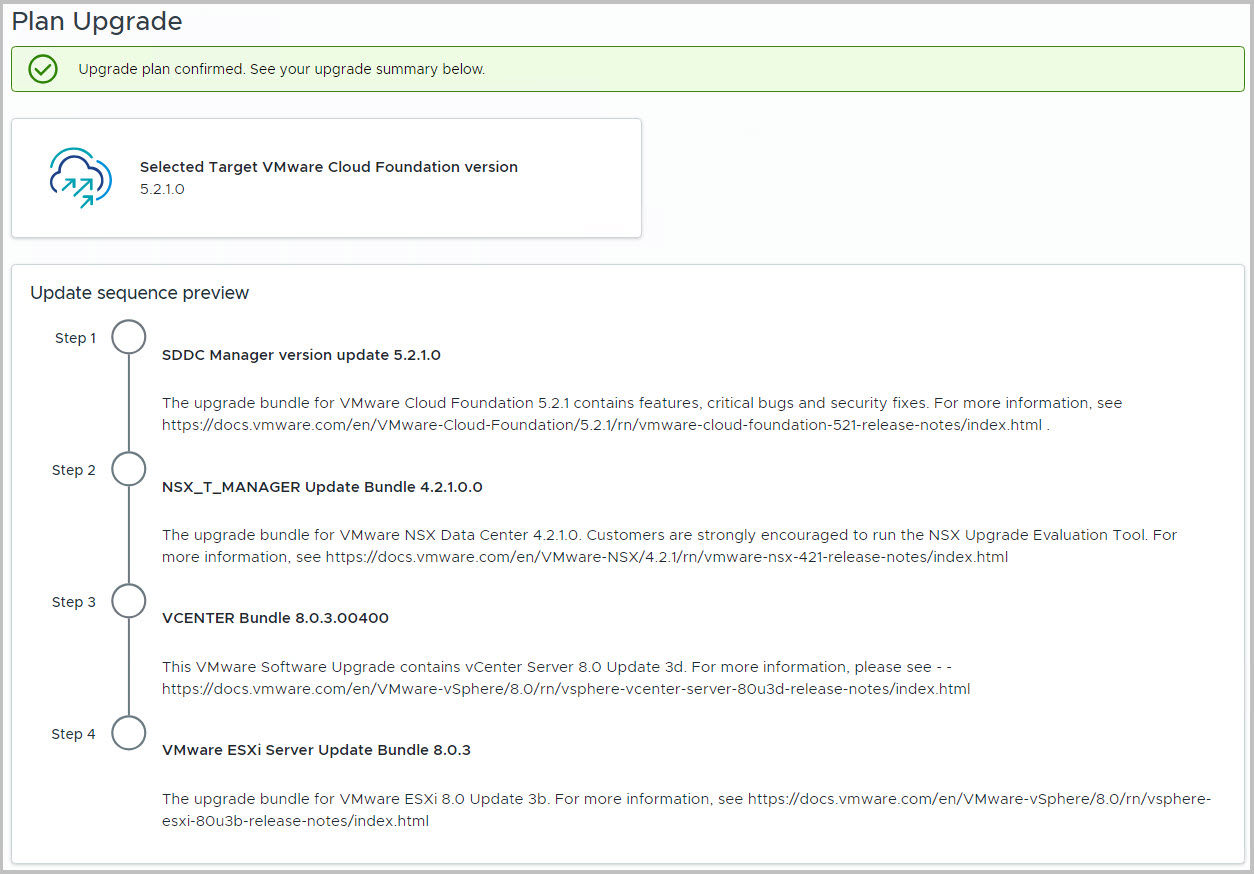
- Click Done
- For vCenter Update 8.0 U3b Click Download Now
- After some time, you can find the progress bar the monitor progress, you will find the Update ready for download
- Make sure you run the Precheck and confirm the findings
- Note since VCF 5.x you can precheck against certain updates, in this case vCenter Server specifically. You might also be able to check against NSX-T of ESXi hypervisor updates
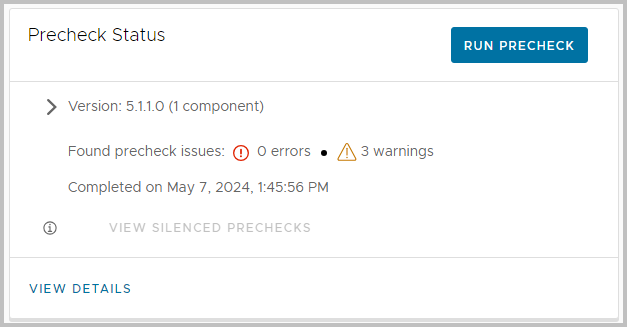
- The Upgrade process can be kicked off. However, please make sure you:
- Make sure you have made a manual backup in the vCenter VAMI, in case a restore is necessary
- Disabled monitoring in Aria Operations or other software
- Run the precheck, see below as well
- Once you are ready to Go, e.g. monitoring has been disabled, you can
- Click Download Now (if not already done so)
-

- Press the button to Configure Update. Previously the button was named Update Now

- You will first need to provide the Upgrade Mechanism, whether if it is the Reduced Downtime Update (from within SDDC Manager), or the vCenter Regular Upgrade (through the VAMI). I will choose the latter, primarily because we had some enhancements (e.g. disk sizes) for vCenter Server.
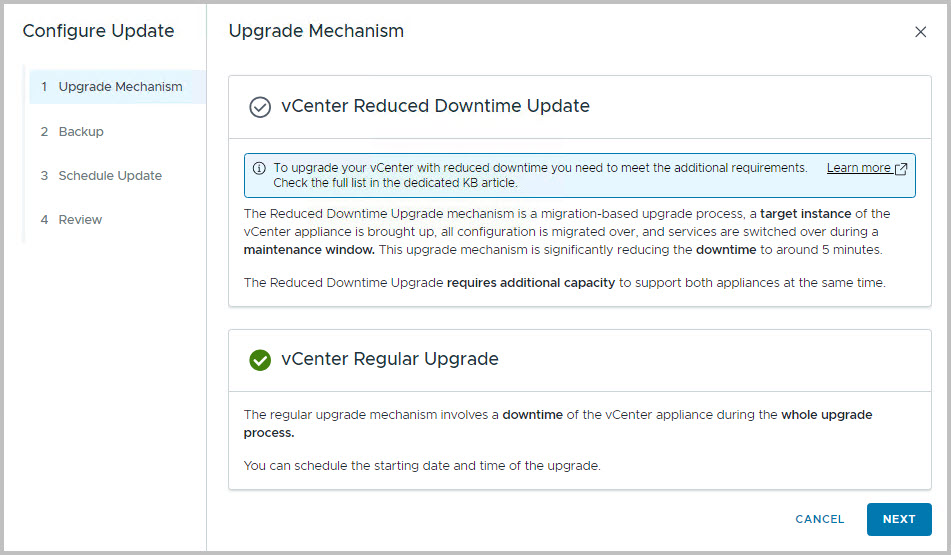
- You need to confirm you have run a backup. You should have done this through the VAMI at port 5480.

- You are allowed to schedule the update. In this case, I would like to update it now. Click Next
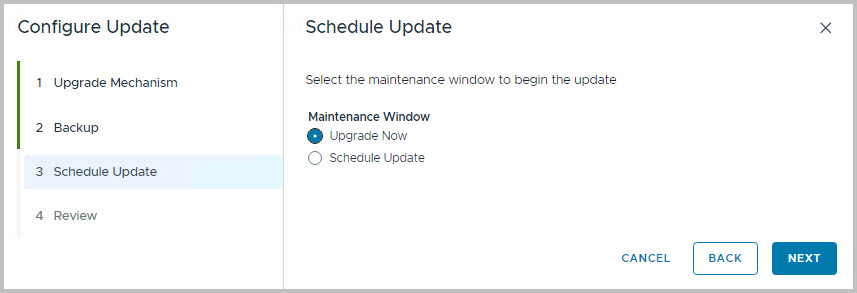
- You can click Finish after you have reviewed the Update Configuration

- Since you have been connected to the VAMI (to backup the configuration before the update started), you can navigate to the Update Tab here. You will immediately find that the downloaded ISO is being staged. Hold on now, since any moment the update itself will initiate.
-

- You might need to refresh the page to find the following screen
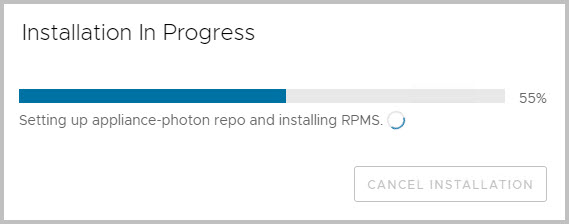
- You can always keep the VAMI open. We will return to SDDC Manager to view the status through View Status

- The steps that are outlined will sequentially be marked complete. Note that the last phase might take longer than expected.
- To monitor the progress through the vCenter Server CLI, please use the following command to track:
tail -f /storage/log/vmware/applmgmt/PatchRunner.log
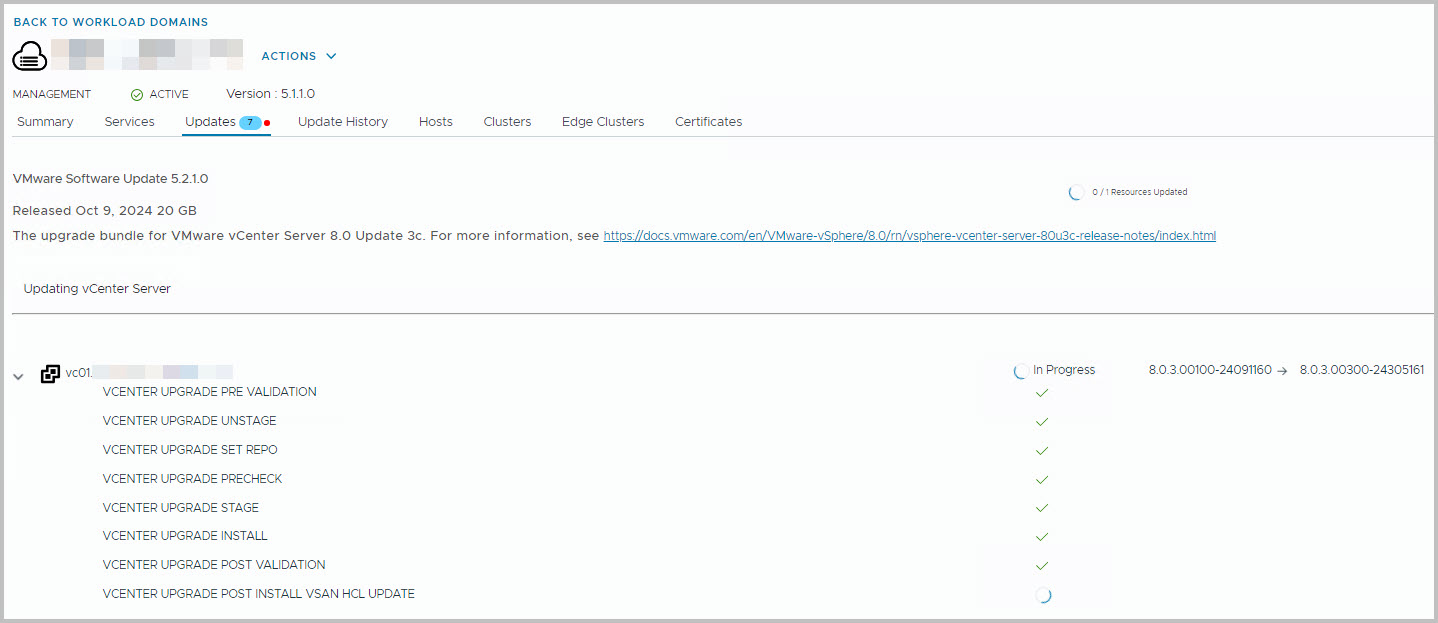
- After a while the VAMI installation completes
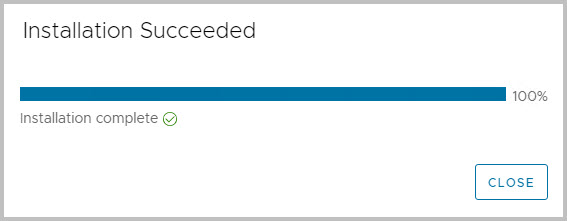
- Be patient, since the vSAN HCL Update will complete eventually. In some cases, this might take longer (than one hour)!
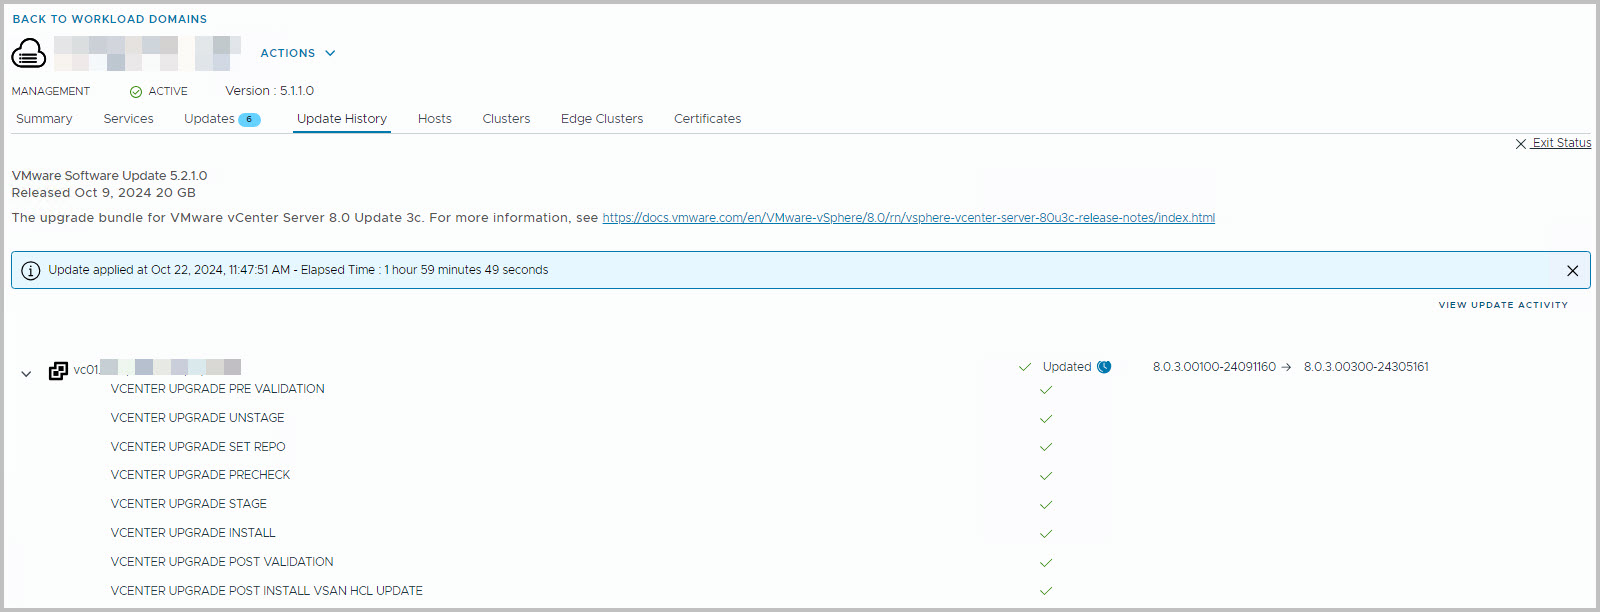
- After the deployment is complete, the SDDC Manager might mention your environment is in Mixed Mode. You will probably have other ELM vCenter Servers in your VCF environment’s Workload Domain, which require an upgrade as well.

- Now move to the next upgrade, in this case the workload Domain. The steps involved are the same, but they are more likely to target production workload, and require additional services to be disabled (e.g. VMware Cloud Director or VMware Horizon)
- You will find that a download is available for the next step: VMware ESXi Update 3b. You can already start the download.

- If all vCenters have been upgraded, it is a great moment to Upgrade the ESXi hypervisor from ESXi 8.0 U2 towards 8.0 U3b. That’s where the next and last blog post in this series is all about
- Well done!
