This blog post highlights the steps involved to restore your file-based backup to a newly deployed vCenter Server.
Requirement: the VMware vCenter Server Appliance ISO consists of three installer types: Windows, Linux or Mac
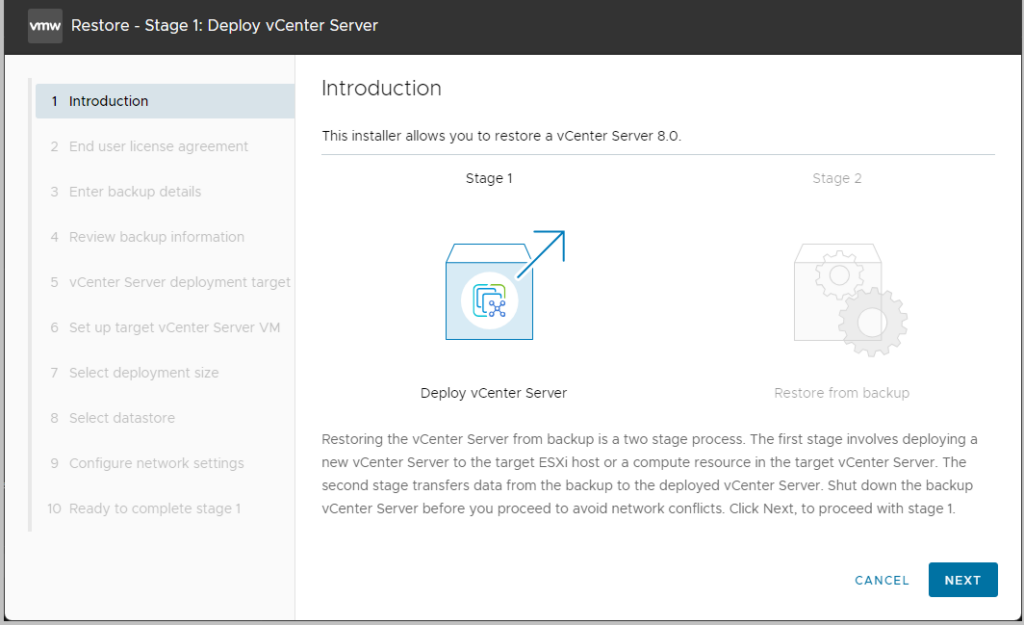
The ISO disk image includes the UI and CLI installer for install, upgrade and migration for VMware vCenter Server Appliance. In the case of a restore, you will choose to Install a vCenter Server. During the two-phase process, you will need to provide the backup/restore location. e.g. your own NAS, a local SMB share or an https page. Phase ONE deals with the deployment of a clean VCSA, phase TWO takes care of importing the backup and bringing the appliance back online.
Make sure you have the SSO credentials in case you are running an Enhanced Linked Mode configured vCenter.
Background: the reason for a restore can be found here.
Phase ONE
Download the ISO from here, mount the ISO, and run the installer executable from ..\vcsa-ui-installer\win32\installer.exe
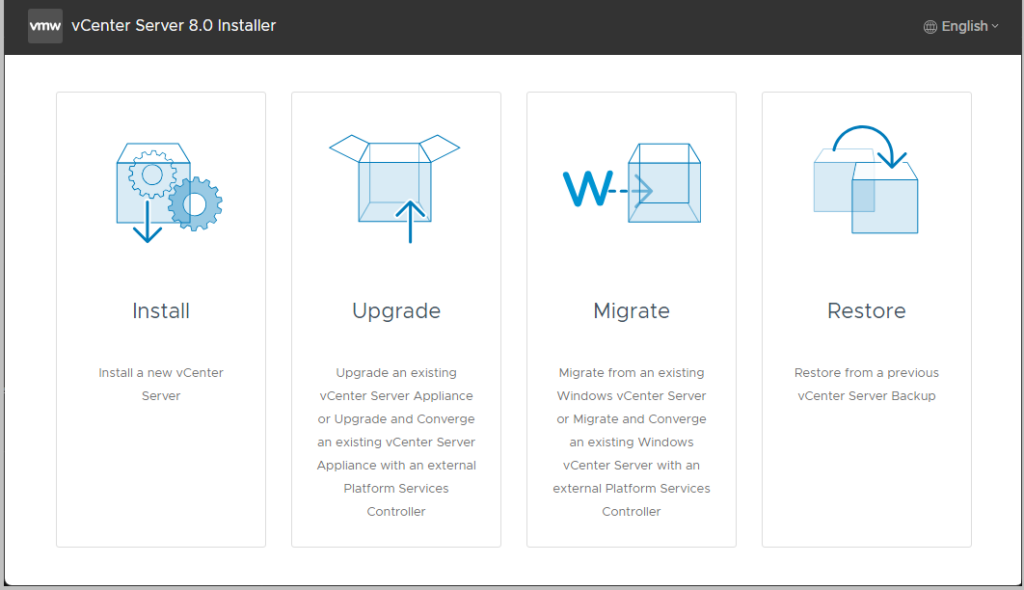
Choose Restore (from Backup)
Accept the EULA

Enter backup details; please specify the complete path, or do it partly, and the installer lets you browse the folder structure, e.g.:
- ftps://192.168.1.5/backup or
- smb://192.168.1.5/backup
Type in the corresponding user name and password with sufficient permissions.
Note: the backup process will automatically create the necessary folder structure ../vCenter/sn_vcsa.dmware.local with folders for each backup in here (dated, and starts with M for Manual, S for Scheduled backup)

Review the Backup Information Sources you just entered

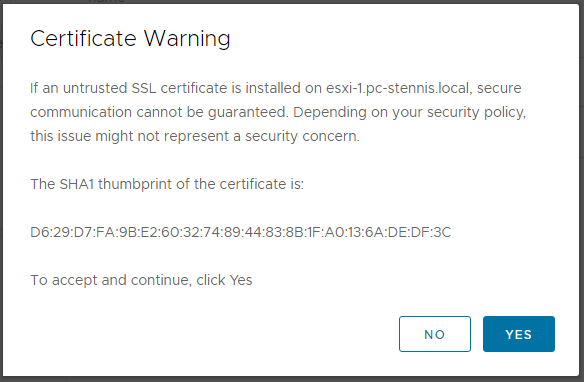
Enter the IP address or hostname of the ESXi host or vCenter Server you are deploying the new vCenter Server to. Enter the credentials with appropriate access to deploy the new VM.

Accept the certificate warning
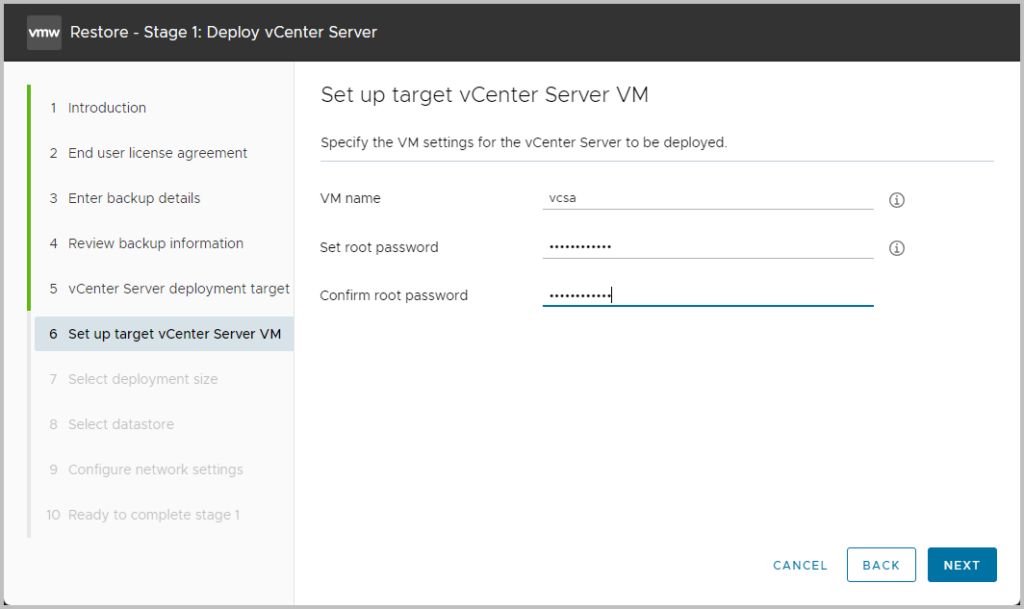
Target Server VM : enter the VM name, as well as the root password, which can be used for an SSH session, as well as for the VAMI
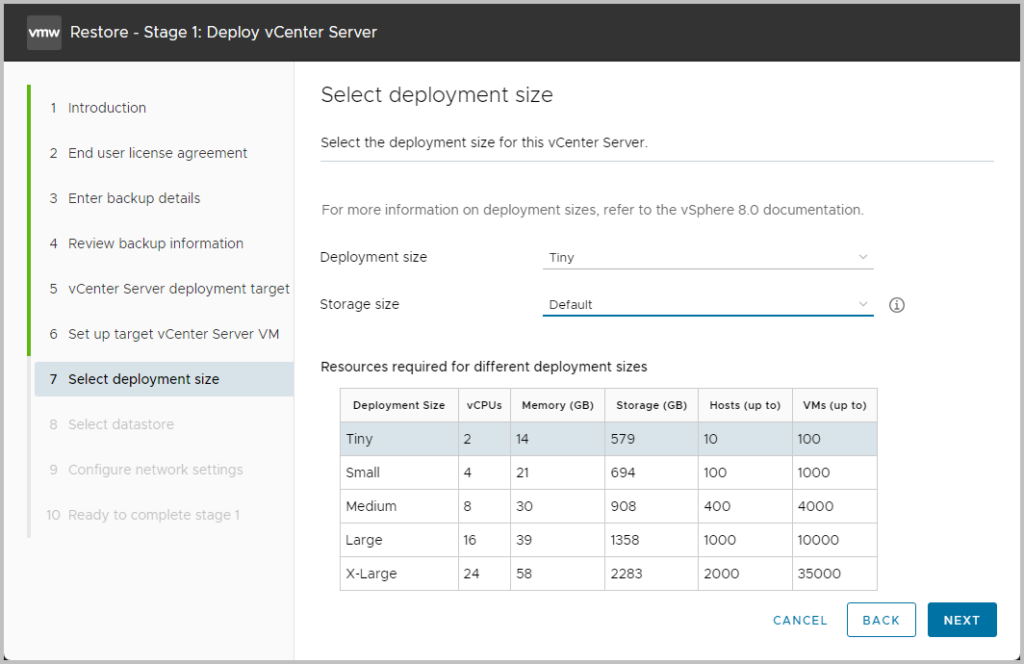
Select the vCenter Deployment Size. If you decide to increase the vCenter’s capacity, this is the time to do so.
Select datastore; the faster, the better. Choose vSAN if available. In my case, just a local VMFS6 datastore.

Configure Network Settings

You will probably find out the Installer will check if the FQDN exists or is reachable.
Please disable the network adapter on the old VCSA, or perform a GuestOS Shutdown .

Review the previous steps

Click Finish to start the Deployment Stage/Phase.
Ready to Complete; As it explicitly mentions:
Shut down the original backup vCenter Server before you proceed to avoid network conflicts.

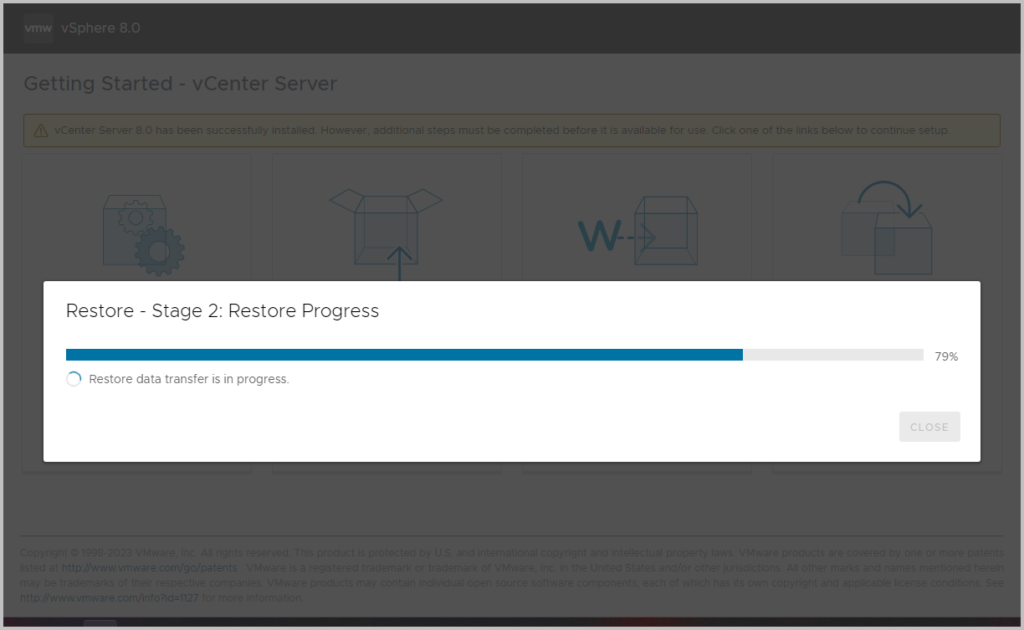
After 15 minutes, the deployment phase ONE has finished

You can proceed with Phase TWO automatically, or start it manually from the https://[vCenter-IP-FQDN]:5480.
Phase TWO
Takes place after Phase ONE. You can start it from the [IP]:5480 while entering your root credentials for the VAMI


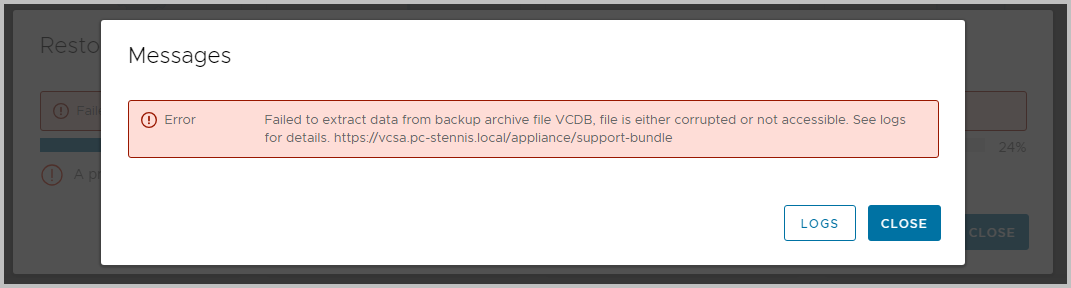
Errors I ran into: extracting seems not possible. This possibly due to using the FTPS protocol on the Synology NAS,
Using the smb:// protocol seems to work out flawlessly