Even though I have performed these steps numerous times, the VMware Cloud Director update has never been written down, at least not by me in this blog.
Despite there are only a few steps, a picture says more than a thousand words.
This blog is based on the VMware documentation is based on: Upgrade Your VMware Cloud Director Appliance by Using an Update Package, and targets a VMware Cloud Director 10.5.1.1 to 10.6.0.1 Update
Create offline consistent snapshots of all cells
- Shutdown VMware Cloud Director provider/tenant portal on each cell, starting with the standby nodes and finally the master node
Do not assume vcd01-1 is the master, use the VAMI (through port 5480) to check the actual PostgreSQL master.
/opt/vmware/vcloud-director/bin/cell-management-tool -u admin -p <admin_username> cell –status
/opt/vmware/vcloud-director/bin/cell-management-tool -u admin -p <admin_username> cell –quiesce true
/opt/vmware/vcloud-director/bin/cell-management-tool -u admin -p <admin_username> cell –status
/opt/vmware/vcloud-director/bin/cell-management-tool -u admin -p <admin_username> cell –quiesce true - OR as VMware likes it
/opt/vmware/vcloud-director/bin/cell-management-tool -u <admin_username> cell –shutdown - Turn off the Cloud Director nodes using the sh/opt/vmware/vcloud-director/bin/cell-management-tool -u <admin_username> cell –shutdown
- Create snapshot of the 3 powered-off VMs through the vSphere Client and give it valid description for the snapshot
- Power-on the master node
- Wait for the master node to finish booting (approx 2-5 minutes)
- Power-on the slave nodes
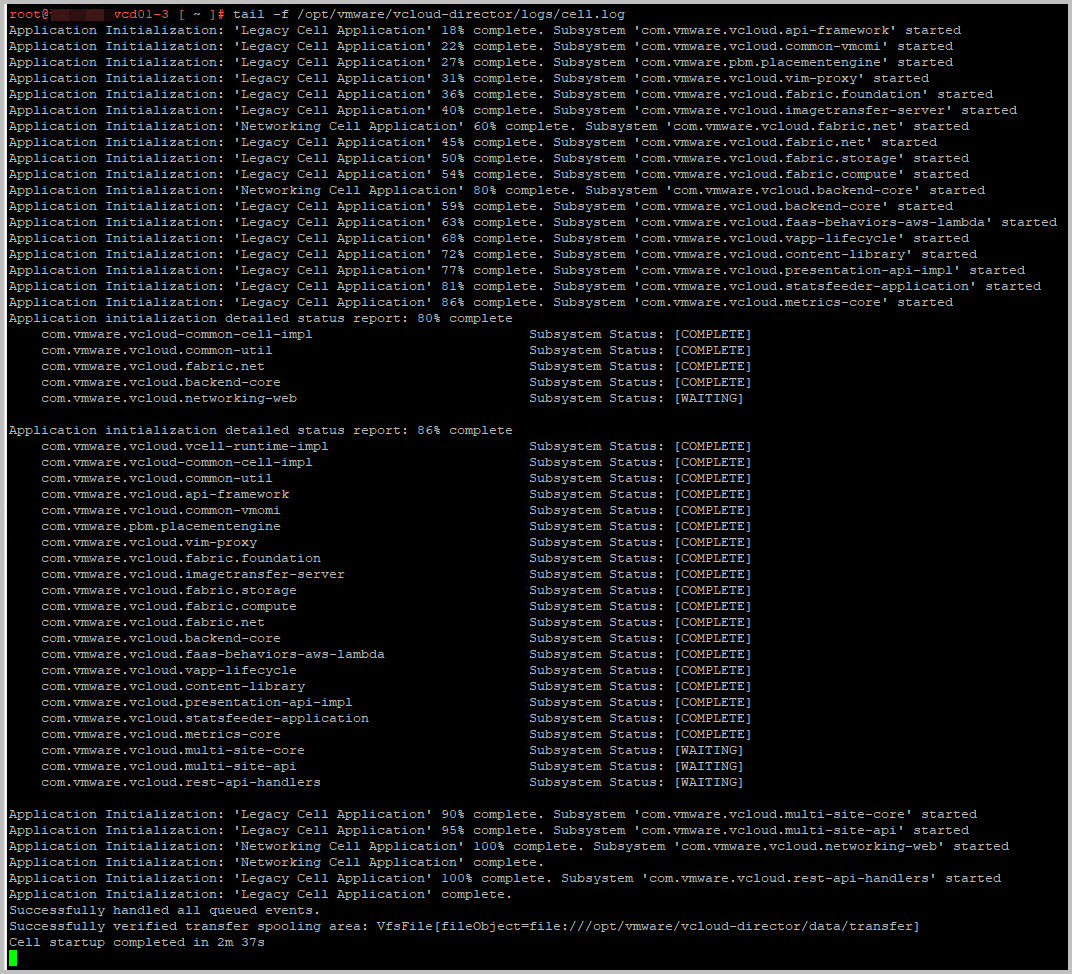
- Confirm the successful boot on the nodes through the following tail command:
tail -f /opt/vmware/vcloud-director/logs/cell.log
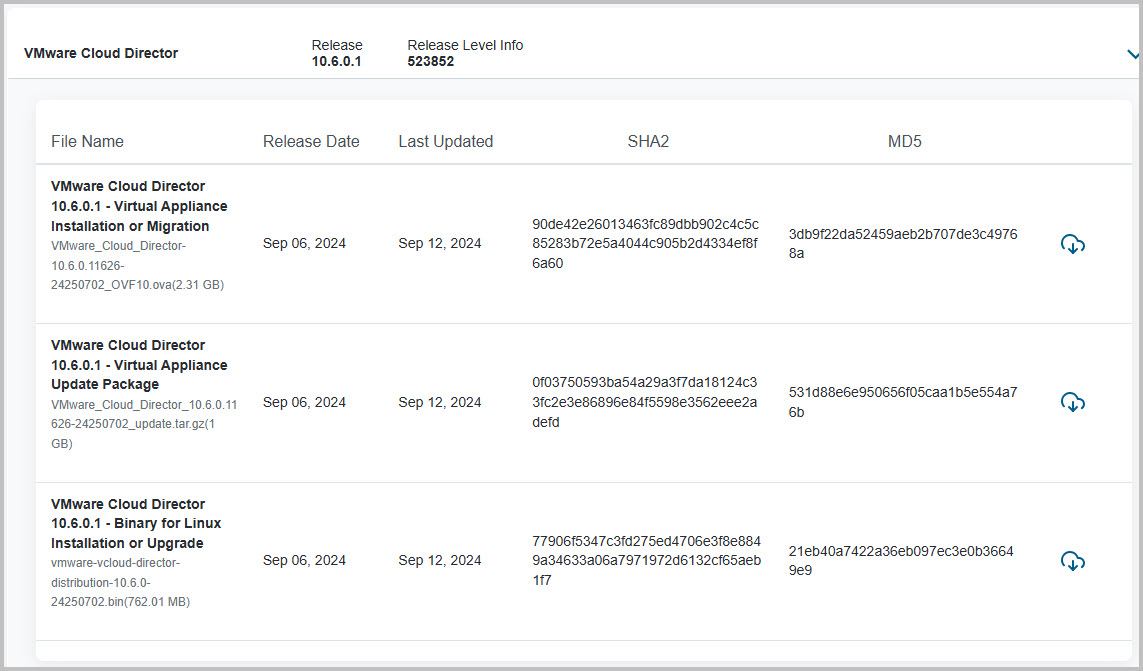
Dowload the binary
Make sure you have downloaded the binary from the Broadcom Support website.
The file name is as follows: VMware_Cloud_Director_10.6.0.11626-24250702_update.tar.gz
You can also find the MD5 checksum here. Copy it to validate the downloaded file later : 531d88e6e950656f05caa1b5e554a76b

Perform the upgrade
-
- In a Web browser, log in to the appliance management user interface of a VMware Cloud Director appliance instance to identify the primary appliance, https://appliance_ip_address:5480.
Make a note of the primary appliance name. You must upgrade the primary appliance before the standby and application cells. You must use the primary appliance when backing up the database. - Start an SSH session to each cell
- Clean shutdown VMware Cloud Director control panel on each cell with , starting with the standby nodes and finally the master node. Do not assume the vcd01-1 is the master, use the VAMI on port 5480 to confirm this is the node running the actual PostgreSQL master.
Turn off the appliances from secondary to primary using the previous commands above:
/opt/vmware/vcloud-director/bin/cell-management-tool -u <admin_username> cell –shutdown - Please make sure to create a database backup of VMware Cloud Director, through the primary node :
https://appliance_ip_address:5480/backup - Upload the update package “VMware_Cloud_Director_10.6.0.11626-24250702_update.tar.gz” to the appliance (in /tmp) using WinSCP
Note: You must upgrade the primary appliance first. - Check if MD5sum is correct
md5sum VMware_Cloud_Director_10.6.0.11626-24250702_update.tar.gz
Output must be:
md5 : 531d88e6e950656f05caa1b5e554a76b - Create the local-update-package directory in which to extract the update package.
mkdir /tmp/local-update-package
- Extract the update package in the newly created directory.
- cd /tmp
tar -zxf VMware_Cloud_Director_10.6.0.11626-24250702_update.tar.gz -C /tmp/local-update-package - Set the local-update-package directory as the update repository.
vamicli update –repo file:///tmp/local-update-package
- Check for updates to verify that you established the repository correctly.
The upgrade release appears as an Available Update. - Apply the available upgrade

- Verify if the upgrade was succesfull

- Repeat steps 6-12 on the remaining cells (one by one) on the secondary nodes
If all VMware Cloud Director nodes have been updated, you can progress further. - Back-up the database on the primary node (VAMI UI)
https://appliance_ip_address:5480/backup
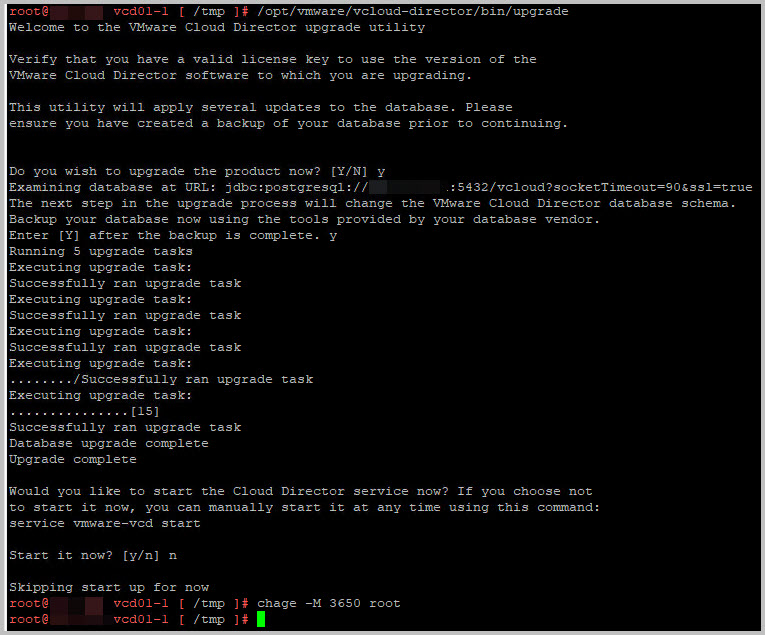
You will notice the backup mentions the new VMware Cloud Director release - The next step is to run the VMware Cloud Director database upgrade utility from the primary appliance.

- Press Y (to start the upgrade), Y ( to confirm you have performed backup a few minutes earlier) and N for the start of services
- Optional: on all nodes please give the command to set root user to non expiry: chage -M 3650
- Shutdown each VMware Cloud Director appliance, start with the standby nodes and finish with the primary
You know the commands - Power-on the master node through the vSphere Client and wait at least 2 minutes
- Confirm the successful boot on the node through the following tail command:
tail -f /opt/vmware/vcloud-director/logs/cell.log

- Power on the remaining standby cell nodes and confirm the successful boot.VMware Cloud Director seems to be updated to 10.6.0.1 now, congratulations!
- Restore connectivity to your environment, e.g. Load Balancer
- In a Web browser, log in to the appliance management user interface of a VMware Cloud Director appliance instance to identify the primary appliance, https://appliance_ip_address:5480.
That’s it!
Please make sure you plan it well with the tenants, your -internal- customers.

