With VMware downloads now hosted on the Broadcom Support Portal, users need to adapt to a new process for accessing product files. Broadcom provides a script-driven method to retrieve download links from the new depot, helping streamline access for entitled users for VMware Cloud Foundation and vCenter Servers. In this blog, we’ll walk through the key steps from the official KB article to help you use the provided script and navigate the updated VMware download system efficiently.
Following this VMware Blog I decided to write this blog for customers to allow to update their VMware-Broadcom Download Depots.
Requirements
Make sure you have the following details available and ready to use:
- VMware Broadcom Download Token
- SDDC Manager / vCenter Server: FQDN (Fully Qualified Domain Name)
- SDDC Manager / vCenter Server: SSO user name
- SDDC Manager / vCenter Server: SSO password
- SDDC Manager: root password
In order to run the Broadcom script, you will also require:
- PowerShell 7.2 or higher
- VMware PowerCLI 13.3 or higher
You can check your versions using:$PSVersionTable.PSVersion Get-Module VMware.PowerCLI
If you don’t have the required versions installed, you can download PowerShell 7 here or use the following code:
Invoke-Expression "& { $(Invoke-RestMethod 'https://aka.ms/install-powershell.ps1') } -useMSI -Quiet -EnablePSRemoting" - Install the latest PowerCLI using
Install-Module -Name VMware.PowerCLI -Scope CurrentUser
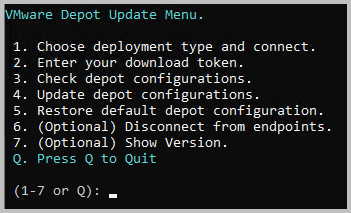
The process follows a few phases, as outlined below:
- Create a Download Token
- If you are a vExpert with the required credentials (VCP-VCF Administrator or Architect) and want to use your acquired licenses, use the following link: https://support.broadcom.com/group/ecx/alpine-certificate
- Download the script
- Run the script (this phase has five steps)
Create a Download Token
You can generate your own Download Token from here. In case of permission issues, you can find more info here.
A direct link to generating your download token:
You will end up with a 32-character length string (0-9, a-z and A-Z), which will eventually be used to create an authenticated, verified download link. This generated key is unique to your account; do not share this token.
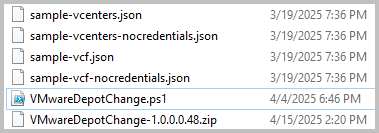
Download the script
Download the script from the following Broadcom KB, at the moment of writing (April published, updated: August 2025) the script is named:
VMwareDepotChange-1.0.0.0.48.zip VMwareDepotChange-1.0.0.0.53.zip
Extract the file using your favorite extraction tool.
Run the script
Start PowerShell (with Administrative credentials) and run the script

Step 1: connect to SDDC Manager and vCenter Servers
Step 1a VCF Deployment
Go to Step 1b if you don’t have a VCF environment, but only vCenter Servers.
From the main menu, choose Option 1. Choose deployment type and connect.

If you choose VCF, you can fill in the necessary details
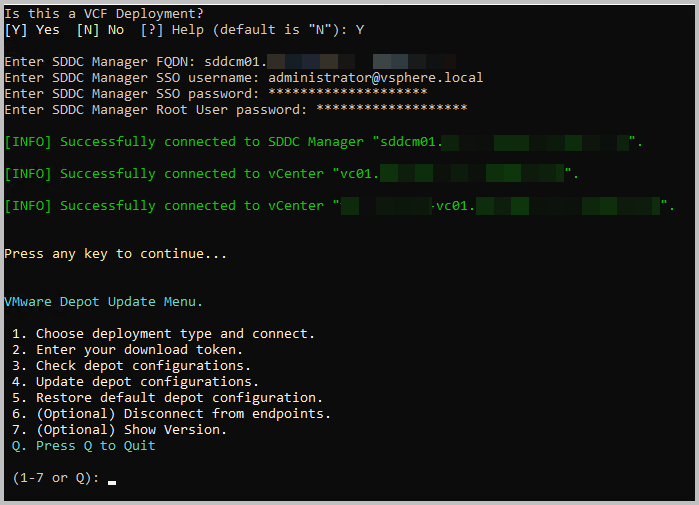
You will find out all Enhanced Linked Mode vCenter Servers are automatically taken into account.
The menu pops back up after completing. Step 1 has finished, go to Step 2.
Step 1b vCenter Server directly
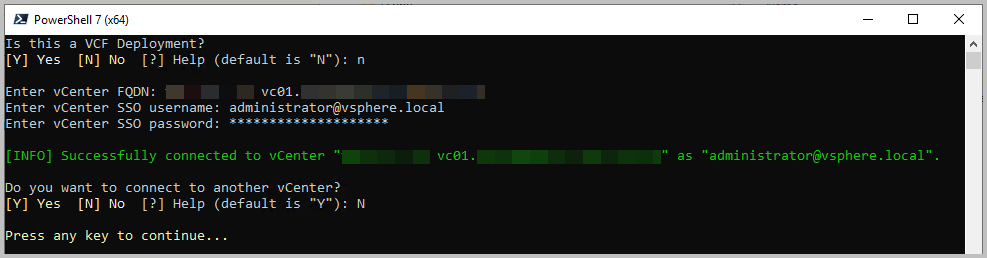
If you are not running VMware Cloud Foundation, you can re-configure vCenter Servers directly…
Fill out the respective details, just like with the VCF option.
Step 2 Enter Broadcom Download Token
From the main menu, choose Option 2. Enter your download token you have ready from the Requirements section.
![]()
As said, this download token will be used to create your own authenticated, verified download links.
Step 3 Scan current configuration
From the main menu, choose Option 3. Check depot configurations.
You need to fill in some of you virtual infrastructure’s components login credentials:
- Enter the SDDC Manager’s FQDN and press enter
- Provide the SSO User name, e.g.: administrator@vsphere.local or your company’s AD integrated account
- Provide the corresponding password
- Provide the SDDC Manager’s root password
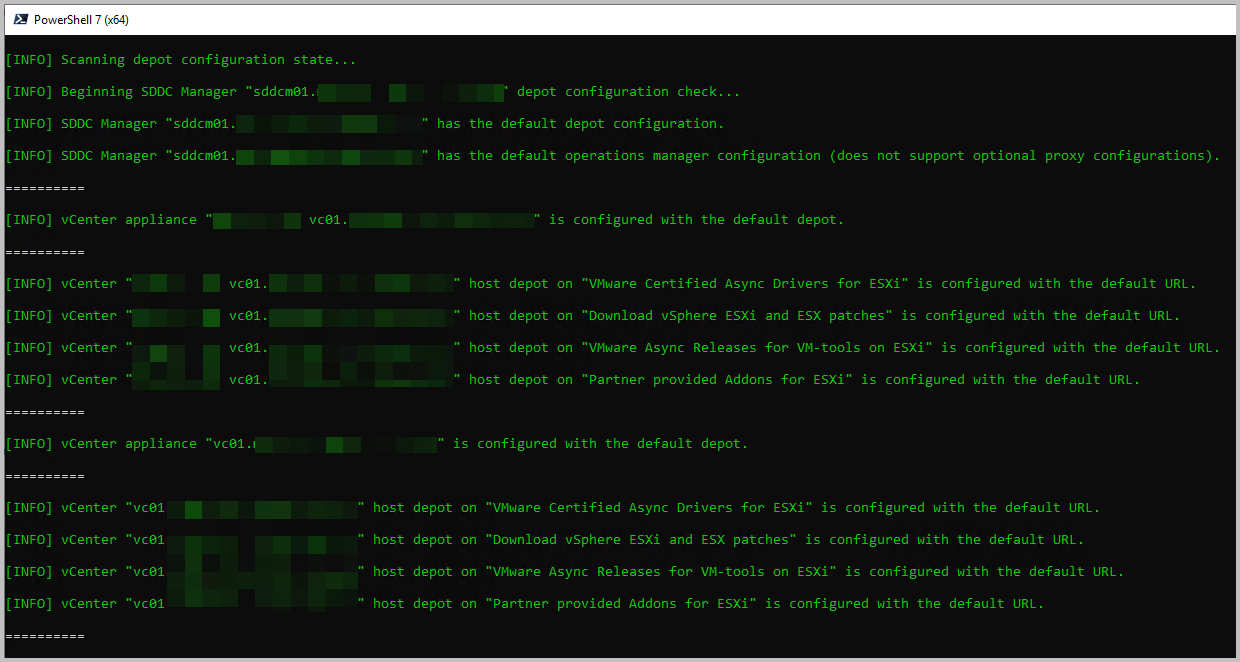
The script will check the current configuration, which will probably be the default VMware Download Depot. You will notice that each (Enhanced Linked Mode) connected vCenter Server will be addressed by this script as well.
Step 4 Configure Download location
From the main menu, choose Option 4. Update depot configurations.
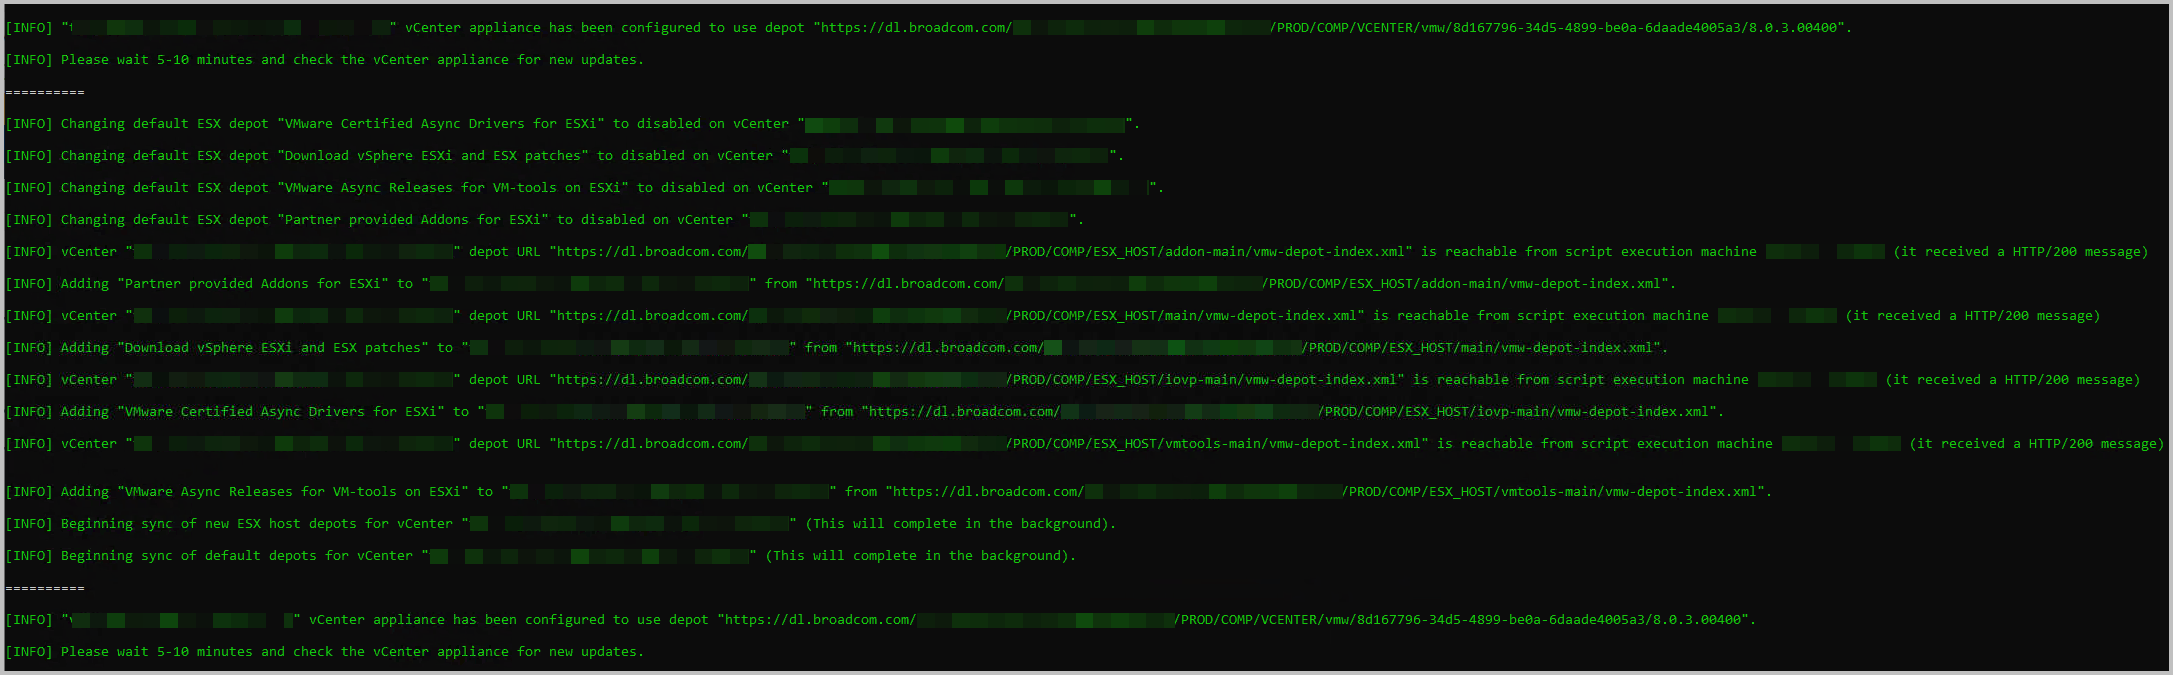
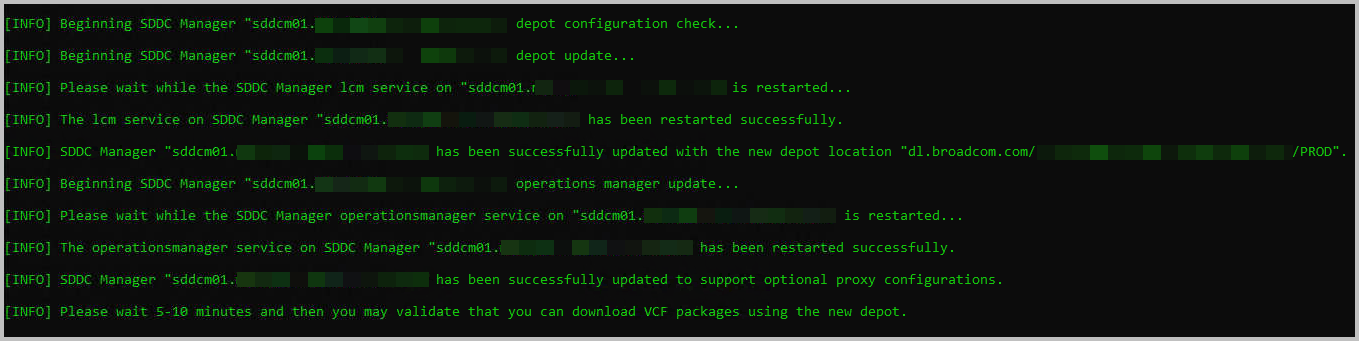
While analysing the responses, you will find that updates to vSphere Lifecycle Manager, the vCenter VAMI, as well as SDDC Manager (Bundle Management) are made. That’s it. You got the job done, it’s too easy
From the main menu, choose option 6, to disconnect from all connected vCenter Servers. This is not necessary, but good practice.
Step 5 Validate the components
When logging into the vCenter Server VAMI (port 5480), you can find the repository location updated as well.
Navigate to Update > Settings
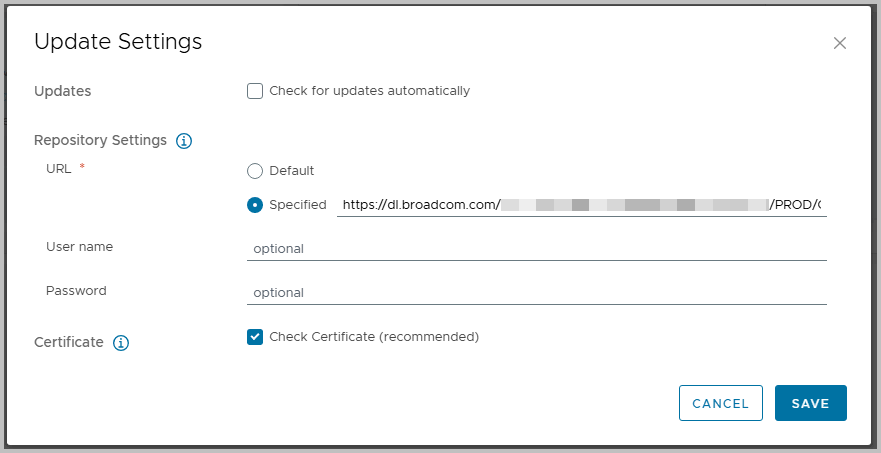
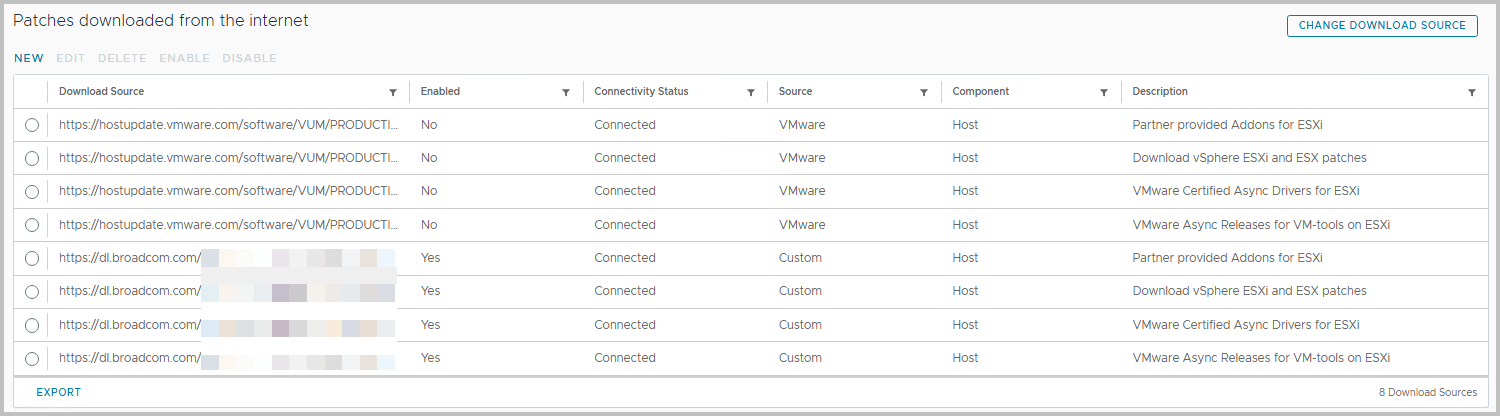
In vSphere, navigate to vSphere Lifecycle Manager > Settings > Patch Setup.
Notice that new custom Broadcom entries were added, and the old VMware download depot are disabled (Enabled:No)
Also, when performing this activity after April 24th, 2025, the Connectivity Status will -probably- be disconnected for the VMware download depots.
Well done: you will be allowed to keep on updating from Broadcom Download Depot. Yeah!
🧩 Common Issues you might run into
🔹 Script Fails to Run or Shows Unexpected Errors
Make sure you’re using the correct versions of the required tools:
- PowerShell 7.2 or higher
- VMware PowerCLI 13.3 or higher
Check your current versions using:
$PSVersionTable.PSVersion
Get-Module VMware.PowerCLI
If you need to update:
- Download the latest PowerShell from the official GitHub page
- Install or update PowerCLI with:
Install-Module -Name VMware.PowerCLI -Scope CurrentUser -Force🔹 Authentication or Entitlement Issues
- Ensure your Broadcom Support account is entitled to the product you’re trying to download.
- Verify you’re using the correct SSO or support credentials when running the script.
- If the script hangs or times out, re-authenticate and check any proxy/firewall rules.